Sunday, May 16, 2010

Orange Star Flower

~ Isn't she lovely? Isn't she wonderful?~
Information on this plant is lacking so I shall share what I've discovered myself!
This is the Chesapeake Series Star of Bethlehem. Botanical name: Ornithogalum Chesapeake Sunset. Also in this series are the Chesapeake Blaze, and the Chesapeake Sunburst. They are truly beautiful flowers! This is my second year having them around, but these pictures are from this year, as I couldn't find my last years pictures upon lots of searching. They were designed to be container plants. They are generally kept as an indoor house plant although I've read about incidences where they can be kept outdoors over winter - in zones 9 and 10. They do not like frost! They also like to be below temperatures of 90 degrees, anything above that will cause them to become dormant. Preferably a temperature between 65 and 75 would be best. They like bright indirect sunlight, so something just short of full sun. I had/have mine indoors in a window shaded with blinds. (mine is dormant already this year, hence this post -it's me living vicariously through these pictures) and I might go buy another one too. =) I took a few photos to see the different views of the plant, rather than just seeing the blooms in the first picture which is my favorite. I just thought I'd show the full plant in case anyone was interested. Flowers should be pinched off at the base of the stem when spent. This will give the plant the ability to work on giving energy to those flowers that are still healthy, rather than wasting energy trying to help the dying flower. (I tried to word that in a non botanical way considering I'm not a botanist) - though I wish I was!
This year I had a long leaning stem as you can see in the background here. They are supposed to grow about 8-12 inches in height. I'd say that stem was about 10 inches maybe. I speak in past tense because mine has already died off this year. It's a perennial so if cared for right, you can enjoy this year after year. It first blooms in spring (or summer depending) and then dies back. Once the flowers on the whole stem are spent, stems should be cut back, and the stalks and leaves left until they are turning brownish, then you can stop watering and let them become dormant. Don't be sad that your plant didn't last as long as you expected. This is normal. It can produce stems for several months, but individual stems last only about 3-4 weeks. I just dug up my bulbs and am going to let them dry out. I haven't done this before, so it will be an experiment for me. And I plan to replant them next spring early. Perhaps outside! If I'm digging up bulbs anyway, why not plant outside? - after ALL danger of frost that is.

It's a breathtaking display, that's for sure!

Thursday, May 13, 2010

Spring has sprung!

April showers bring may flowers! .... except there were no april showers. That's the desert for ya. But with my persistent hand watering, we have signs of life! This is the most exciting part about spring!!!! When something that was once dormant has come to life again! I believe this is a Liatris coming up. One of my favorite flowers (although you'll hear my say that a lot!) -especially in cut flower arrangements. Exquisite! I had some bridesmaid photos taken on the beach and stopped at a little sidewalk flower shop on the way for some gerbera daisies mixed with some liatris. So much fun! I wish I had the pics somewhere digitally.

Stay tuned for future posts about my newest hobby, backyard birding! Oh gosh, it's a lot of fun! This is my new hanger that I got. It's made as a system so you can design it how you want it. What hooks where, different deco'd posts and tops and hooks and all sorts of stuff. Highly addicting and not so cheap. But if you're interested...it's from wild birds unlimited.

Oh my goodness, look at the detail in this flower, are you kidding me? Light pink, bright pink, BROWN, yellow and then gold and then even a reddish gold at the very center. Wow! I have a lot of these and their name has completely slipped my mind right now. I'll have to share photos of other colors, but this one has the most color in it. They are all very stunning though! And one of the most magnificant flowers of all times...


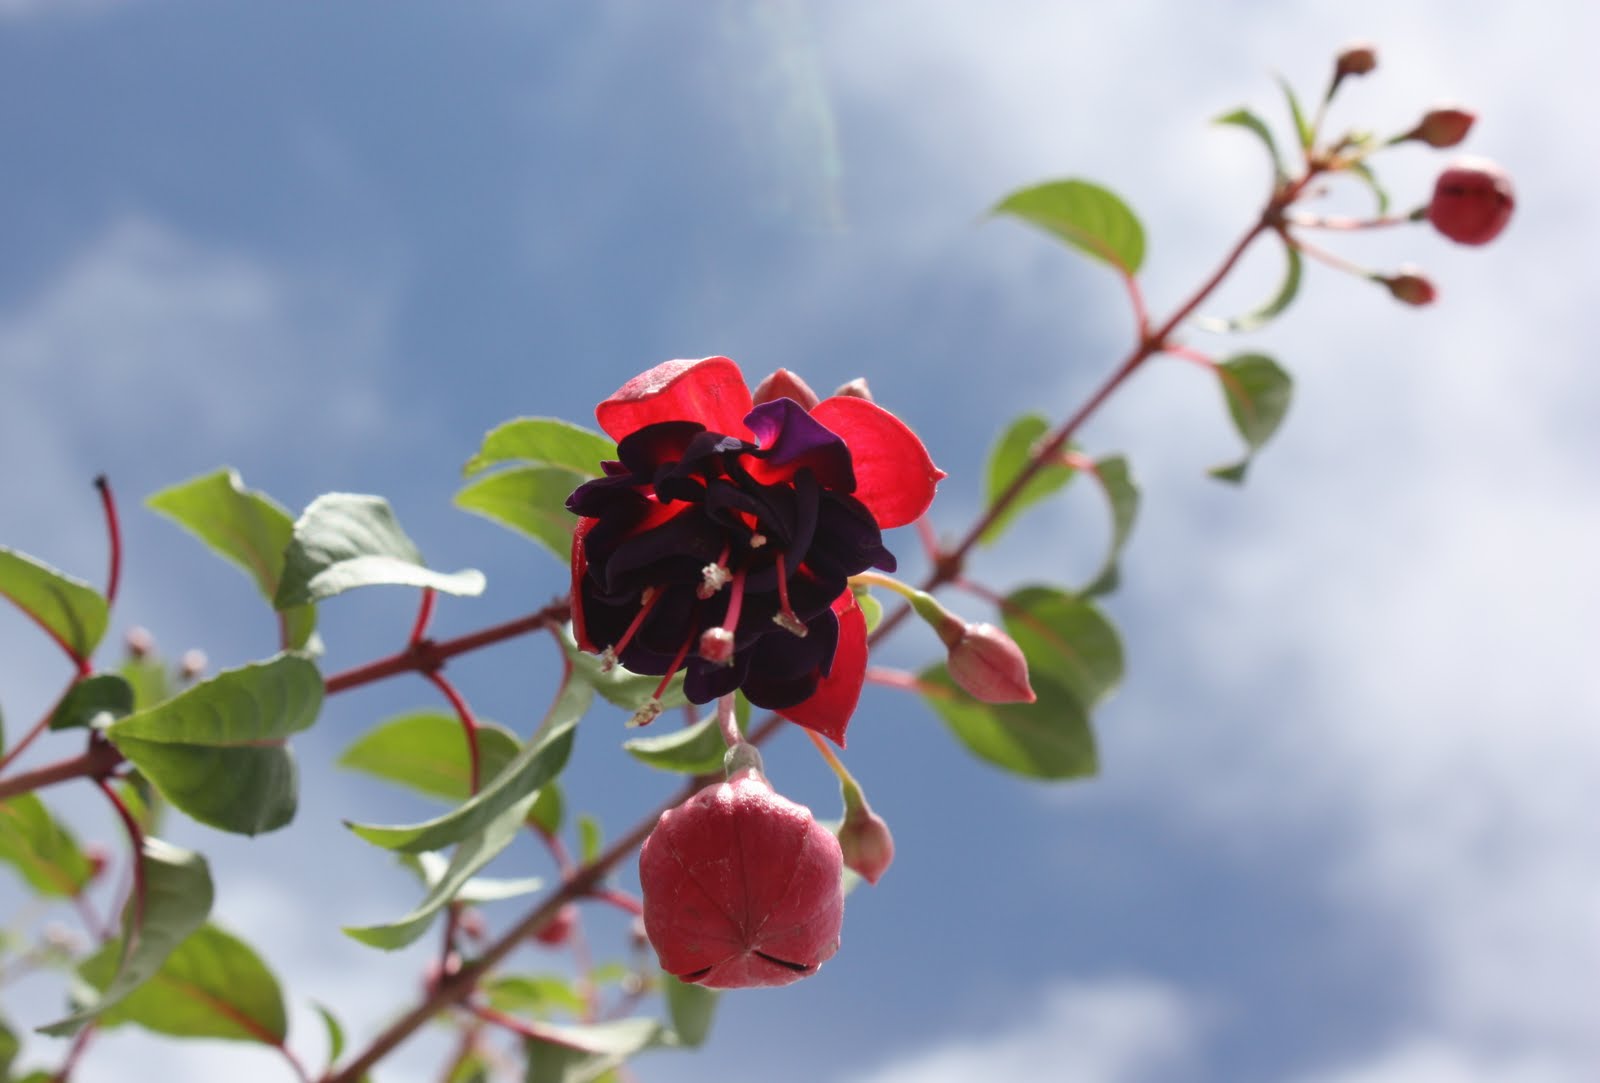
The Fuschia. Wow! If any of you know this plant, you are lucky because it's a charmer. Hot pink outside with beautiful purple ruffled middle, not to mention the sugar crystals hanging off the ends. Let's be serious now... and no politics involved... and some say there's no God?


The front flower is a bit spent. This is a very hard flower to grow. Very picky, very tiffy. It doesn't like wind. Most are grown indoors, but I can hardly stand not having this out in my garden as it is a big time hummingbird attracter! It loves shade, especially in hot places like here in New Mexico. And it's very thirsty... all the time! It also is a fertilizer lover. Must be regularly fertilized, or it will be unhappy. BUT, if you can manage to keep it alive, it will bloom and bloom and bloom for years. I saw some pics online of someone's "fuschia garden" and they were enormous and magnificant looking. One of my favorite combinations are the white with pink centers. So pretty!! I might be getting some soon. We'll see.


Gerbera Daisy. Everyone's favorite right? I love them. I have had a hot pink gerbera daisy in my life consistently for about 4 years now - although I've had many other colors over the years before and during as well. Except this one is a replacement for my 3 year long plant because when moving here from Vegas I didn't want to bring any pests with us, or diseases which were prevalent there. So here's my replacement, although I'm still mourning over the loss of my other one. She was good to me! I know I sound like a freak...but there's a story behind my gerbera daisy. Someday I'll tell.

Verbena. I have tonz of this. White, pink, red, purple. etc. It doesn't love me, but it's a great hanging basket specimen because it trails and spreads. Very nice looking though!

Me and Black eyed susan go way back! My parents have been buying one every year for a LONG time. They are annuals, but they are well worth the year they are around because they grow fast and well! Need a good trellis for a nice show!
Not to be confused with this black eyed susan which is also a very lovely flower indeed!

Are you ready to get your hands dirty!?!?! I know I was. I had anxiety for two months about getting this (food) garden going. It's May and I feel like I'm late. I have to remind myself that most of the loved ones I have are in places where there's still snow on the ground, so I'm not doing so bad.


So I finally got them in the ground! Or the raised ground I should say. These planter boxes were homemade by me using these plans... I love how they look and they make gardening much easier for me here in the desert - the dirt is ROCK SOLID. They are about 24 inches high which makes it a great spot to sit down while caring for your garden, and come harvest time, it will be nice to sit and pick, pull, and reap.


Squash, peppers, tomatoes, watermelon, cantaloupe, herbs, herbs, herbs. I can't wait! and this is only the contents of one box. The rest are sEeD so they are photoless at the time but they are in the ground too. Yay!

This lovely trellis was also homemade using these plans. I really love how it looks despite the few incorrect parts of the plan! If you decide to build this trellis, maybe don't go by the exact product numbers. The ball on top could have been a wooden - non painted one instead so that it could match the rest of the wood, although it's not a big enough deal to me and I think the different color gives it character. My husband went to the store for me on this one and got EXACTLY what the list said like he was asked to. The other problem was the color of the Australian Timber Oil could have been lighter to match the box, although the box gets oranger after time. You'll notice if you look closely in the picture of my dirty hands, that this last box with the trellis is the lightest and that's because it's the newest made so it hasn't seen the sun and watering that the others have. Those elements make the box more orange...which I really like.


My husband added some tweaks to their plans to make the bottom more sturdy (those two small boards supporting the middle post), and one of their measurements were wrong for the bottom two boards shown in this picture. You'll want to measure that distance and go with your own measurements instead. Let me know if you have questions!
Sorry for the length of that post. Lots of details I wanted to add. It's all about education. =) One more little tip is that on this link, you can find garden plans that fit the size of these raised garden beds. I didn't use any of them although I think they are extremely lovely! Especially the flower ones!
If I can make a garden happen here in the dryest, roughest, windiest place, then you too can make it happen! Don't have the space?... container gardening is amazing. Grow vertically. Don't have the time?... well I have no solution for you there. Time is something I need more of. Don't have the climate? You can grow something in every climate there is. I've lived in 4 different states! But let's all remember one thing... I'm just a beginner!!
Happy gardening! Happy hobbying!

Sunday, May 2, 2010

Mod Podge Letters!

This is a really cute way to spice up a childs bedroom! I made these for my sister in law for her baby shower with the pertinent info of the childs sex and therefore name. =) I could have afforded to vacuum before taking these pictures but I'm always in a huge hurry so if I wait til things are picture worthy, you won't ever get to see them!
First of all, I shopped around for letters sold in various shapes and sizes. Shapes meaning - different fonts. These letters are sold at Hobby Lobby, Joanns, Michaels, Roberts, and even Walmart. I'm sure many more places! So it might take a few stores until you find the ones that are perfect for you.
Then I shop around (or scavenge the house) for coordinating scrapbook paper, or fabric, and embellishments such as buttons, twigs, ribbon, tuille, cord, anything really! The skies the limit!
And I apologize for not having step by step instruction photos but I then turn my letters upside down and lay them on the back side of my paper (or fabric - I've definitely done both!) and trace around them in pencil. Cut them out, and then turn them around and mod podge (Mod podge can be found at any of the above listed stores in Matte or Glossy - they also sell it in other varieties specifically for paper on paper that I've never tried yet) them to your wood letters by brushing the mod podge directly on the letters and then laying your paper on there and pressing down everywhere eliminating bumps or creases and rubbing it to be flat to the wood. Then you will want to mod podge with a sponge paint brush over the top of the paper as well. Sometimes with fabric, if you are using them as decorations in a room with say a matching quilt (as I will show soon in an upcoming post), then you will want to maybe skip the mod podge over the top as it will make your fabric a little bit darker and a "wet" look.
End your project by choosing and laying out embellishments as you choose to spice up the name a bit and tie together the whole effect. In the picture below, I used ribbon, twine, and buttons to embellish this set.


Clean up your floor woman!


Also note that these pictures were taken pre fastening the embellishments. So unfortunately there are no final photos, but you get the idea! And I could probably provide some of the project in the room in the end. We'll work on that! Thanks for reading! More mod podge letter examples to come!

Beginner Gardener!

I'm just a beginner vegetable gardener! However, it's that time of year! Yay! Oh gosh, it's so much fun to have a food garden. Going out each day and finding new flowers blossoming to signify the coming of fruit or vegetables. The flowers are always such a fun sign and you can watch them as they transform into budding food. And all knowing you did it all yourself! So rewarding!
I prepare a spreadsheet of all the vegetables that I am going to plant and and the planting instructions and facts so that all the information is right there together when I begin my planting. It's no fun trying to read each packet whilst doing it, but it's also very nice having this sheet for later on when you are wondering when to thin the seedlings, or when to transplant your vegetables, etc. Then I made some labels for mine because I was experimenting with different brands of seeds to see which would do well or better and therefore these labels help me to keep an eye on which was which. A simple garden label works well too. These homemade ones are laminated with my fancy little laminator but they didn't quite keep all moisture out so I reccommend maybe making sure you cut farther away if you decide to do this method, or just going with traditional plant labeling.

~ Seeds, seeds let's plant our seeds! ~ Every year I buy some fun kids plants so my children can plant their own seeds and watch their own little garden grow. I also have my son go out and water his own bucket(s) each day. We have a lot of fun! Lots more gardening to come!!


A really good website that's fun to use is bhg.com. They have a program on their site that allows you to plan your garden and you can actually draw it out and stuff. They also have premade garden plans that are really great too!


Wednesday, March 31, 2010

5 minute pillow covers!

Here's the little tutorial I promised back in 2002. Just kidding, it wasn't that long ago, but it may as well be. I always go to the store during my selected holiday and choose 6, 7 or 8 coordinating fabrics. I think that's over kill but it happens to be hard to choose because I love all the fabrics and I have lots of pillows so I like to cover them all. So I only buy a 1/2 yard of each fabric that I like and really, you could get away with a couple inches less depending on your pillow size. Prewashing is always a good idea!

I take my half a yard and lay it out vertically in front of me RIGHT side facing up, then I fold the closest side in about half way and then fold an inch or so over as shown above. Keep in mind this is the WRONG side showing now.

Then bring the other side in halfway to match your first side and again fold a one or two inch fold over and make sure it overlaps the other one as shown above. It may take a trial and error to get them even to where your pocket will be in the middle of the pillow rather than 3/4 of the way up or something.


Here's another picture. It's hard to tell because I'm using fabrics that don't necessarily have a right or wrong side.


Then I just make sure my pillow is about the right size of the pillow and pin it to where it will need to be all the way along the edge. I've actually made so many of these I stopped pinning them. You may feel it's unneccesary as well but it's always good to pin what you are sewing to keep it together and avoid sewing it wrong.

Then one stitch down each side does the trick.


Other side...


Then turn them right side out, press if needed (I never have to because my pillow pulls it to an unwrinkled state). Then slip your pillows into the covers and you have a awesome season friendly display of pillows on your couches. So much fun!! And if your house is like mine, your regular season pillows totally clash when it's a holiday. So this makes it so much more flow-ish.


Here's my other three. Lucky number 7 is how many pillows I usually do.


Another pic! Enjoy! I hope someone makes some of these and sends me some pics. These were my fall pillows (Nov) by the way. I'm aware that it's almost Easter but I am trying to catch up on blogging at the moment after a crazy 6 months!

Monday, November 2, 2009

Halloween fun!

Ok for sure you should ignore the scratches in my table, it's definitely something I need to work on redo-ing one of these days but it's a big project so it will probably have to wait until we buy a house and then I'll care! That and my coffee table. Kids sure know how to ding up wood furniture! I made this table runner for Halloween because I couldn't find one to buy that I really liked. My husband actually suggested this and so I got right on it. Anytime he suggests I do something, that gives me the free will to spend the necessary time and small amounts of money to complete these projects - all with his support and sometimes even his assistance. I love him!
One thing you hopefully will notice is I'm a frugal hobbyist. I like to make things using stuff I find around my house or recycling things (in a non whimsical (or ghetto) way). I will hopefully be able to show you that in the upcoming posts.
This probably took a total of 45 minutes to make! Easy peezy!

I thought it would be fun to have some Halloween pillows. Mostly because once I got all my halloween decorations up, I was really annoyed with the color of my pillows for my normal decor so I thought I'd just make some pillow covers for them. So I made these three pillow covers. They each called for a 1/2 yard of fabric (depending on your current pillows). All I had to do was one stitch down each side and that's it. They took 5 minutes to make each. For real! And you don't have to be a seamstress either. And you will feel super awesome that you accomplished it! I also got this fabric 50% off!

My husband loved them and told me he wanted me to make more! He's so funny! So I did 4 more. I think 7 halloween pillows on our couch was definitely overkill but hey isn't that what halloween's all about anyhow. I have zero regrets because I love them!

I just took up close pics so you could see the different patterns in the fabrics. I used all coordinating fabrics that had glitter in them. There were so many other cute halloween fabrics that I wanted but I had to stick with the ones that all were in the same design line.

Candy!

The one on the left here is probably my favorite. And in case you didn't notice, they match my table runner as well!


The orange one here is also in the running for my favorite one! Probably takes 2nd best!
I'm just starting to make the pillows for my harvest/thanksgiving decorations and while I do that, I'll take better pics to show how I made these pillows so easily and then perhaps you could make some too! Christmas pillows anyone??
If you do try any of my ideas (not that making a pillow is really MY idea, but you know what I mean...), I would love love to see your results!! So please share!